Saturday, January 10, 2009

Cinnamon Cake

oh yum yum, mmm...so good!

I actually JUST made this and it's so good that I snapped a quick pictured before I finished my piece because it was the last piece! The cake disappeared that quick!

Super easy to make and with ingredients you probably have on hand. I got this recipe from Recipezaar(you're shocked, I know, anyone want to buy me a membership to that site? No? Ok then, maybe I'll ask hubby for it for my birthday :), back to the recipe at hand mouth). The poster of this recipe is Kittencal, I have made a few of her recipes and they are great, she is a wonderful contributor to the site! Here is the link to the actual recipe page Kittencals Easy Cinnamon Flop(Cinnamon Brunch Cake).

I definitely topped the cake with WAY more cinnamon then the recipes states, our family loves cinnamon so much and a "hint" of cinnamon just doesn't do it for us! I literally put an entire layer of cinnamon on top, and even with that hubby and I both agreed that it could use some cinnamon actually mixed into the cake batter as well. The cake was ever so slightly on the dry side(and I did add the egg, it would be even more dry if you omitted the egg), so I think next time I might add some applesauce or something to help make it a little moister. Not that the cake was bad dry or anything, it was incredible, but I just think it would taste that much better if it was a little moister.

Sorry for the pic being a partially eaten piece lol, if I remember I will take a pic of a full piece of the full cake next time.

100_1375

2 cups all-purpose flour(I did 1/2 white and 1/2 whole wheat, which could be the reason for the slight dryness)

1 1/4 cups sugar(I used brown sugar)

1 1/4 cups milk or half and half

1-2 teaspoon vanilla (optional) or almond extract (optional) (I used a generous amount of vanilla, always do :) )

3 teaspoons baking powder

1 pinch salt

1 large egg (optional)

TOPPING

1/2 cup brown sugar, more if desired

1-2 teaspoon cinnamon(like I said, I added way more, a full layer, yum!)

1/4 cup melted butter

chopped walnuts (optional) or pecans (optional) (didn't add these, we're a little nuts, but not big nut people ;) )

1. Mix together the first 7 ingredients.

2. Pour into either an 9"x13" pan or 2 8" or 9" round pans.(if you're using a 9"x13" why not save yourself a dirty bowl and mix it right in there, suppose you could do the same with the round pans then just pour half in the other as well).

3. Sprinkle your brown sugar and cinnamon toppings on top and pour on your melted butter.

4. Bake in a 350 degree oven for 30 minutes if you are using a 9"x13" pan, and for 20-25 minutes if you are using 2 8" or 9" pans.

Saturday, December 20, 2008

Diet Coke Sloppy Jo's

We call these "Sloppy Mommy's" in our house, why? Because I'm Jo of course! LOL

This is a tasty lower fat/calorie Sloppy Joe that I found on Recipezaar(Diet Coke Sloppy Joes). Quick and easy to make, I usually serve them on some of my homemade buns, but if I don't feel like baking buns I just buy some whole wheat hamburger buns to use. If you are a bean person I think a can of kidney beans would go good in them, my family does not like beans though and I'm not much of a fan either so I don't use them.

100_0960

1 lb Lean Ground Beef

1 medium Onion, chopped

1 1/2 tbsp Corn Starch (original recipe calls for arrowroot which I have never had in my pantry so I use corn starch instead)

1 cup Diet Cola(I generally use Coke Zero because that's what I drink and have in the house)

2/3 cup Ketchup

2 tbsp Vinegar

1 tbsp Worcestershire Sauce

2 tsp Mustard

1. Brown ground beef and onion in a largish pot, drain/rinse or whatever it is you like to do to get all the fatty stuff off.

2. Dump beef/onion back into pot and add in remaining ingredients, mix well. Cover and simmer for about 30 minutes.

3. Scoop out onto toasted buns or bread. If you prefer you can serve it on pasta or rice or whatever. I like it on buns though, yum yummy!

I think I mentioned this before, but I'll say it again anyway ;). I find draining the fat off of ground beef and pork to be nothing but a pain in the rear and it still leaves the meat very greasy, so anytime I brown ground meat for a recipe I dump the meat into my colander after it's done and rinse it under warm water to wash away all the greasy yucky stuff.

Technorati Tags: ,

No Bake Chocolate Cookies

Wow, how neglected my poor food blog is. I can't believe it's been more than 4 months since I posted on here...oops! LOL. So I'm going to try to get at least a few recipes posted this weekend.

This is one of my favourite cookie recipes. Not only is it so chocolaty and full of yumminess, but it's super easy to make and you don't even have to turn on the oven to do make them, just need the stove. I will most likely be making these again within the next few days. They are definitely bad for my ever widening body, but they are definitely the perfect comfort thing right now with what's going on with us right now(if you don't read my main blog, My Absent Mind, my hubby got laid off a couple weeks ago).

So enjoy this great addition to any holiday cookie tray, but great all year long! Can you believe I took this pic last Christmas and never got around to posting this recipe! Not that it's a hard recipe to find mind you lol, I think this is a pretty popular cookie!

100_0527

1/4 cup cocoa

2 cups Sugar

1/2 cup Milk

1/2 cup Margarine

1/2 cup Peanut Butter

3 cups Quick-Cooking Oatmeal(I've used regular Oatmeal before by accident and they came out just as good)

1 teaspoon Vanilla(am I the only one who thinks there's never enough vanilla and adds a few good chugs of this stuff?)

1 good pinch of Salt

1. Mix cocoa, sugar, milk and margarine in a saucepan and bring to a boil, cook for about a minute.

2.Remove saucepan from heat and add all the remaining ingredients, mix well.

3. Drop spoonfuls onto wax paper and let cool.

I will often put a sheet of wax paper on one of my baking sheets and put some of the cookies on there so I can set it in the fridge or freezer so some of them set quicker so we can enjoy them sooner.....I mean who wants to look at them and have to wait for them? We want them now don't we?

Tuesday, August 5, 2008

Eggplant Casserole

100_1471


This is my mom's recipe! I am not a big fan of eggplant, but I LOVE this casserole! You can't even tell it's eggplant in it!

I don't have a pic because I haven't made this in years, though I really need to one of these days because I have been craving it! But my friend Rene asked me for it, that is why I'm posting it! When I make it again I will update with a pic.

1 Medium Eggplant

3 tbsp Butter

3 tbsp Flour

1 Onion, chopped

19oz Can Tomatoes, chopped

1 tsp Salt

1 tbsp Brown Sugar

1 cup Grated Cheddar Cheese

1 cup Dry Bread Crumbs

Peel and dice eggplant. Cook in salted boiling water for 10 minutes. Drain. Put in a buttered casserole. Melt butter in a saucepan, stir in flour. Add onions, tomatoes, brown sugar and salt. Cook over low heat, stirring constantly until thick. Pour over eggplant and mix to combine all together. Combine cheese and bread crumbs and sprinkle on top.

Bake at 350F for about 30 minutes.

Friday, June 27, 2008

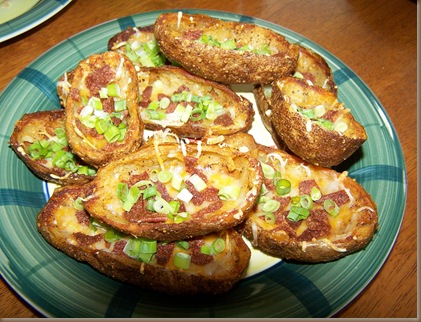
Potato Skins

These are the BEST Potato Skins!! I got this recipe as well from www.recipezaar.com, it is recipe #439008 posted by CrAzYcOoKeR222 and I thank them immensely for posting it!! I just found this recipe last week and have made it twice already because they are just sooooo good!

They are different then any other Skins I have had before, because you actually season the skins before baking them and wow does it ever taste fantastic!! Once again, very little change made to this recipe for me because it was so darn good to begin with!

100_0819

4 large Baking Potatoes(ok, use whatever you have, I usually buy big bags of Russets and just pick the nicest ones out of the bag for baking, I actually find the medium sized potatoes make a nicer size Skin)

4 tbsp Olive Oil

1 1/2 tbsp Grated Parmesan Cheese

1/2 tsp Salt

1/2 tsp Garlic Powder(ok, I put in closer to a full tsp because I love garlic powder)

1/2 tsp Paprika

Pepper, to taste

Bacon, as much as you desire :), cooked and crumbled (I always use Turkey bacon, my family likes it better, lower fat and to us has way more flavour)

3 cups Shredded Marble Cheese

Sour Cream

Green Onion, chopped(I find cutting green onion with scissors to be much quicker and easier then chopping with a knife)

1. Bake Potatoes(my way: stab with fork a few times,coat with olive oil and bake directly on rack at 425F for 50 to 60 minutes depending on size). Then cut in half lengthwise and scoop potato out, leave a little bit to support the skin.

2. Combine oil, parmesan, salt, garlic powder, paprika and pepper. Brush all over both sides of the skins and place them on a baking sheet.

3. Bake at 475F for 8 to 10 minutes, turn over then bake on other side for another 8 to 10 minutes.

4. Turn skins right side up, fill with cheese and cooked, crumbled bacon.  Bake for a few more minutes until cheese is melted.

Top with sour cream and onions and E-N-J-O-Y!!

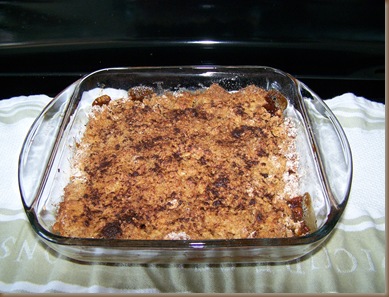
Apple Crumble

hmm, guess where this recipe came from? Yeah, of course, www.recipezaar.com, can you tell I love that site?? LOL

Of course most recipes using apples call for a specific kind, I know some kinds are supposed to be better then others for baking, but who am I to actually listen to stuff like that!? I actually made this recipe because I found some apples in the bottom of my crisper drawer, I have no idea how long they were there for, probably about a month, definitely not nice and crispy to eat alone, but still great to peel them and bake with them!(food costs too much these days to just throw away when not necessary!) . The apples I had were Red Delicious.

This was so easy and absolutely delish! I topped it with some Whipped topping to serve but I'm sure would have been great with Vanilla Ice Cream if we had any.

And it just dawned on me now that if you are in Canada, contact your local Epicure consultant and get some VE Apple Pie Spice, I bet that would be fantastic for this instead of just the cinnamon, I have some but didn't even think of it when I made this! If you're in the US, sorry I'm pretty sure Epicure isn't down there, which is too bad because they have some AWESOME spices!

100_0814

6 Apples, peeled and either sliced or cut into bite size pieces, whichever you prefer, I did the bite size.

1/3 cup Brown Sugar

1 tsp Cinnamon

TOPPING:
1 cup Whole Wheat Flour

1/2 cup Brown Sugar

1 tsp Baking Powder

1/2 tsp Salt

1 egg

1 tsp Cinnamon

1/3 cup Butter, melted

1. Mix apples, brown sugar and cinnamon and flatten out in bottom of a baking dish.

2. Mix all the topping ingredients (EXCEPT cinnamon and butter) with a fork. Sprinkle on top of apples.

3. Drizzle melted margarine on top, sprinkle with cinnamon. Bake at 375F for 40 minutes.

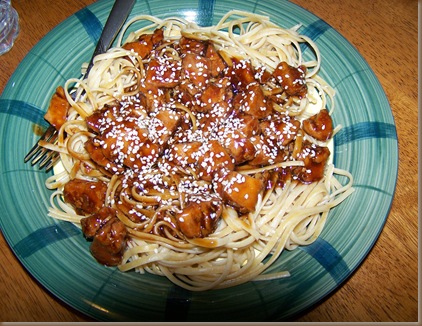
Bourbon Chicken

Ok, so this doesn't have any Bourbon in it, but it has sort of a Bourbon or Asian type chicken flavour. Another one I found on www.recipezaar.com then made my own changes to, although I don't think I changed much on this one from the original posted one as it was excellent to begin with.

This is probably my husbands favourite meal that I make.

100_0770

4 Boneless Skinless Chicken Breasts

2 Clove Garlic

1/2 tsp Ginger

1 1/4 tsp Crushed Red Pepper Flakes

1/2 cup Juice(I have tried this with Apple Juice, Orange Juice, Lemonade and even Apple Sauce...so use what you have, all tasted great, I think the Lemonade tasted best but there was a very subtle difference between all of them)

2/3 cup Brown Sugar

4 tbsp Ketchup

1 tbsp Cider Vinegar(the recipe called for Cider Vinegar which I used to use, but when I ran out I couldn't find it anywhere so have been using Apple Cider Vinegar since and it works fine, I'll be honest I don't know the difference between these vinegars LOL)

1 cup Water

2/3 cup Soy Sauce(I've made it both with regular Soy Sauce and with Low Sodium Soy Sauce, it actually tastes different both ways, better with Low Sodium)

corn starch

1. Heat about 2 tbsp of Olive Oil in a large pot. Cut chicken breast into bite sized pieces and cook in pot until nicely browned and cooked through. Remove chicken from the pot and set aside.

2. Mix all remaining ingredients together and heat over medium heat until well mixed, add about a tbsp of cornstarch to help the sauce to start thickening a bit..

3. Add chicken back in and bring to a boil, then reduce heat and simmer for about 20 minutes. Add more corn starch if needed for a nice sauce.

4. Serve over rice or pasta. I always serve it over Whole Wheat Linguine then top with Sesame Seeds and Green Onion if I have it.

Technorati Tags: ,,